Risk Treatment
Control Strategies
At the bottom of the Threat Explorer panel is a list of all the Controls which can be applied to treat a Threat. A single Control may help to reduce the risk of the Threat, but it may also be the case that multiple Controls are required. Where multiple Controls are needed this is known as a Control Strategy. A Control may be part of many Control Strategies. A Control Strategy may address many Threats.

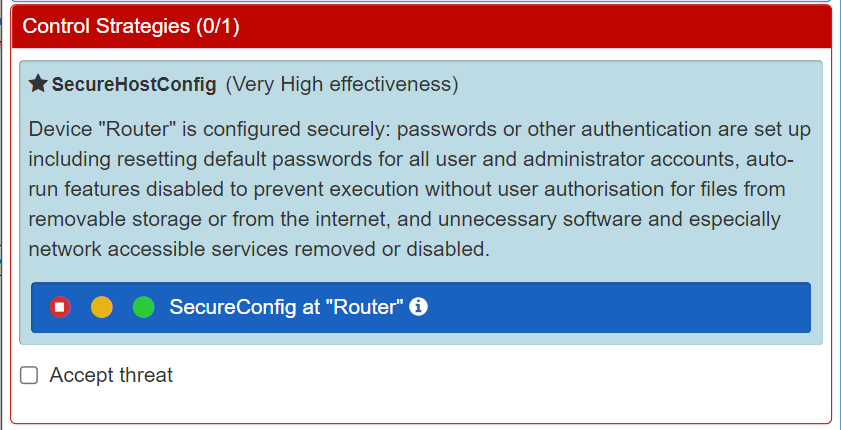
The Control Strategies tab will display all the recommended Controls that should be applied to reduce the likelihood of the Threat. A description of the Control is provided, along with an evaluation of the effectiveness of that Control.
Once you have understood the Control, you can use the same traffic light system that we have seen before in order to add the recommended Control(s) to your system. As before:
- A red light = Control not implemented
- An orange light = Control is planned to be implemented (but is not yet in place)
- A green light = Control is implemented
Selecting the orange light will allow you to experiment with your system by modelling that the Control exists. To discover the effect of introducing a Control (or Control Strategies) to your system select the orange light and run the Risk Analysis again in the same way. You will then be able to observe the difference the Control makes to the Likelihood and Risk levels.
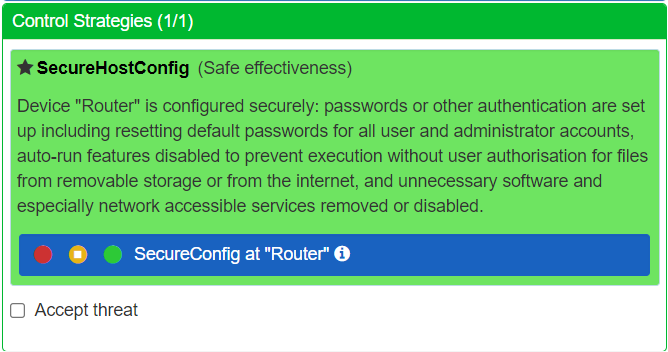
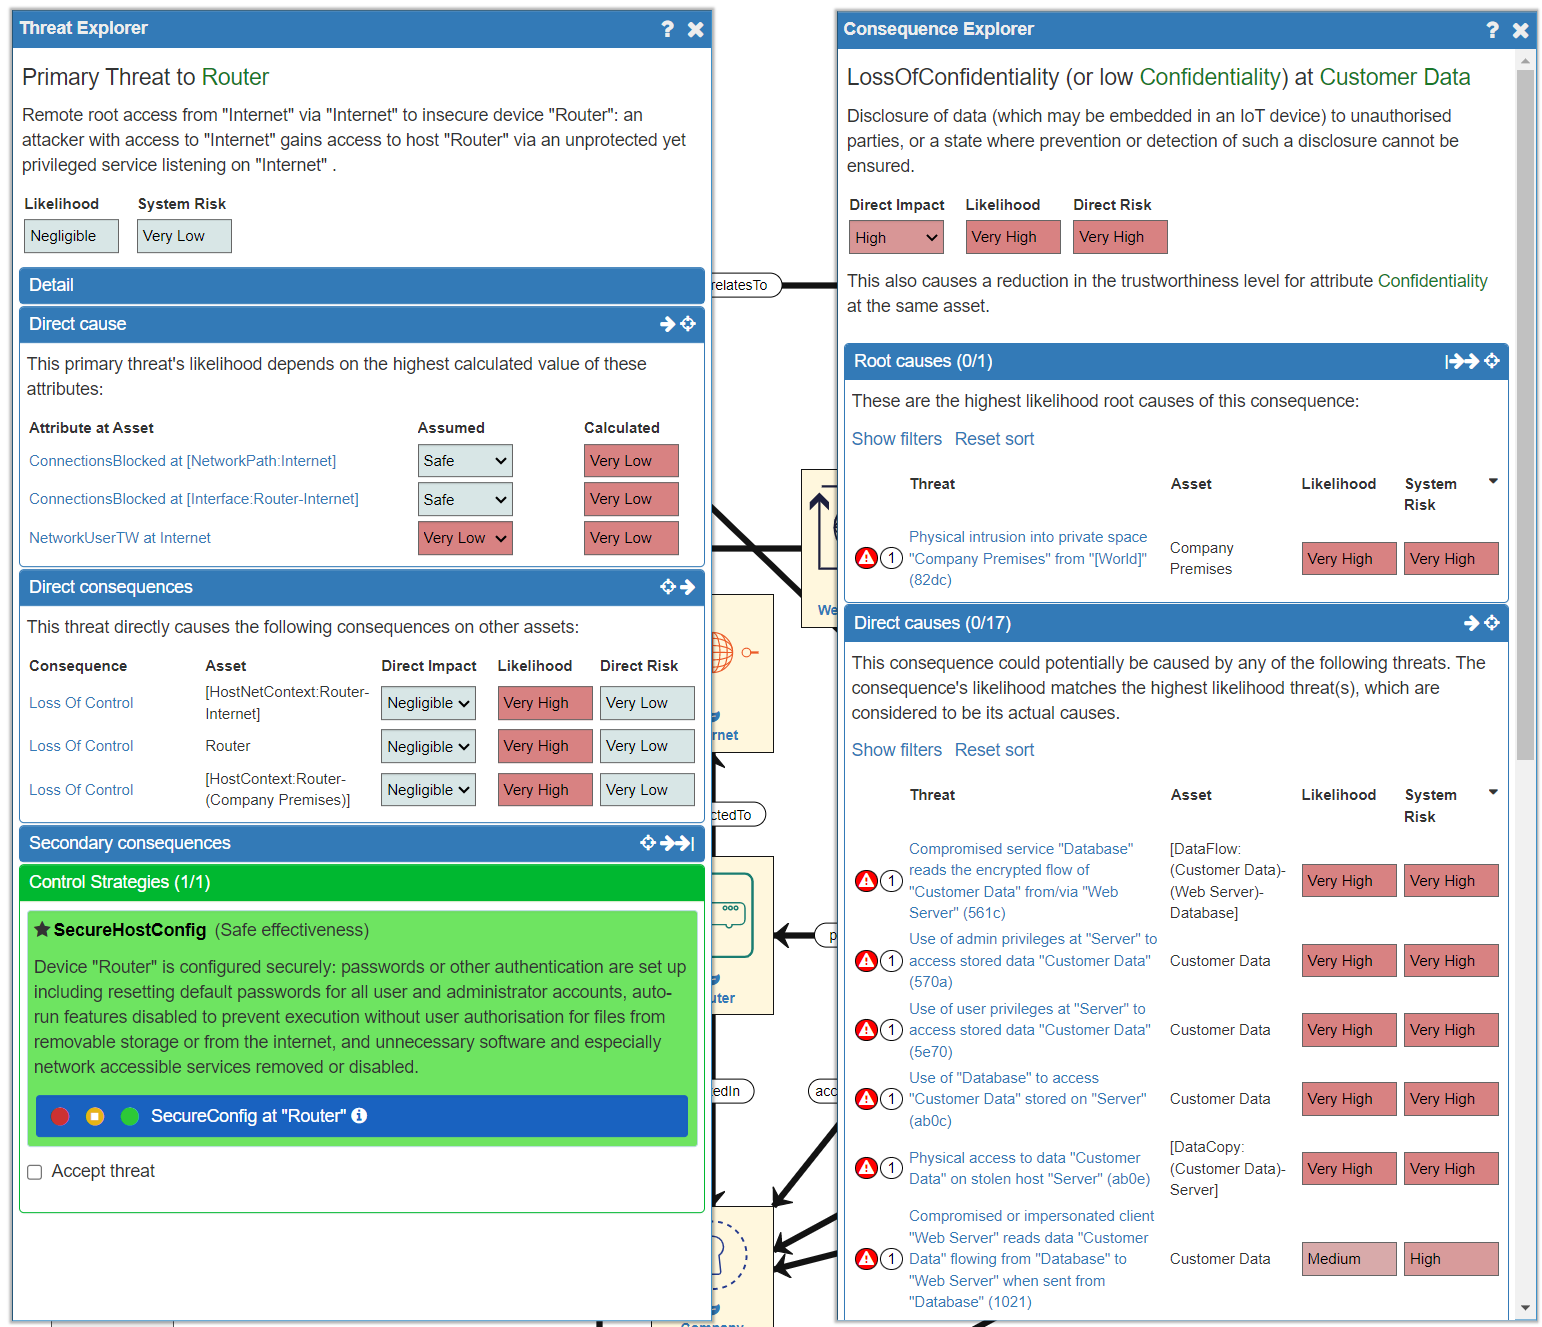
In our example system, we will address the highest risk Threat of Remote Access via the Router by implementing the Control of SecureHostConfig to ensure the Router is securely configured. To do this we select the orange 'light' and note that the Control Strategy tab also turns green.
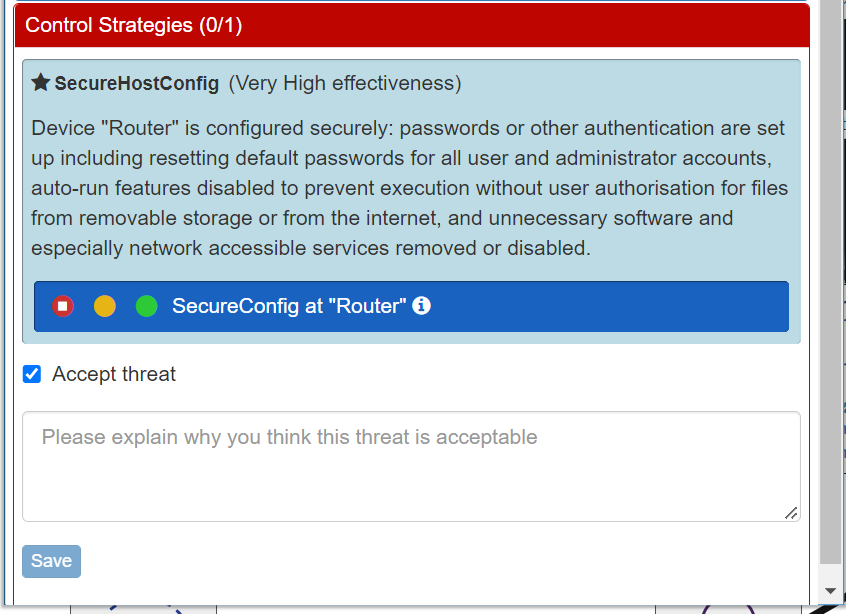
There is an additional option available - Accept Threat. This allows you to decide to 'live with' the Threat without taking any further Control actions. It is very unlikely that you would choose to accept a very high risk Threat. However, when you do accept a risk, you will be prompted to explain why you think the Threat is acceptable.
Once you have made your decision (add a Control or Accept the Threat), you can re-run the risk analysis and see what difference your decision has made to the overall risk assessment in the same way as before (using the red run button in the top right).
In our example, adding the SecureHostConfig Control produces this result:
- the removal of one of the Root Causes of the LossOfConfidentiality of Customer Data Consequence
- a reduction in the Likelihood and System Risk of this Threat from Very High to Very Low
Next we can explore adding a Control Strategy to address the second Root Cause (Physical Intrusion into Company Premises). There is a long list of alternative Control Strategies to address the physical security of the space. All the different strategies are as effective as each other in tackling the selected Threat (all "Safe effectiveness") but they may differ in other ways:
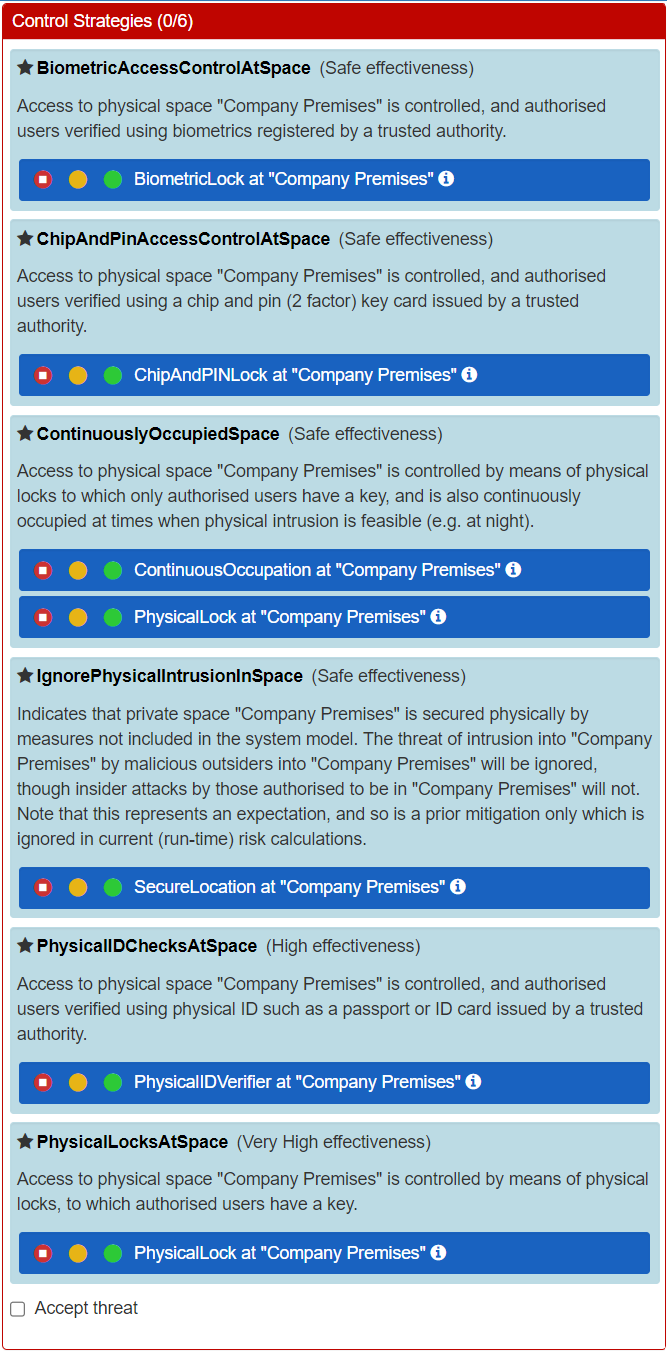
Choosing the "Physical Locks At Space" Control Strategy to secure the physical location produces this result:
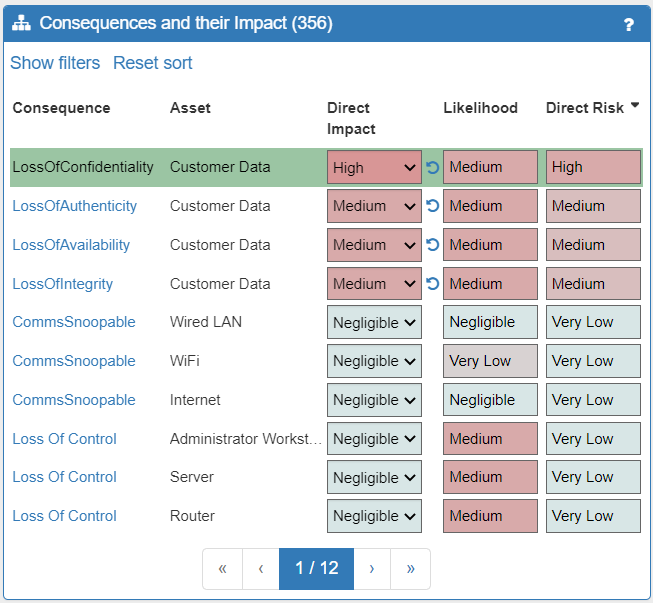
- the Root Causes of the LossOfConfidentiality of Customer Data Consequence have now changed, with various "Medium" likelihood Threats shown instead (now the previous ones have been dealt with)
- the reduction of the Likelihood of a LossOfConfidentiality of Customer Data Consequence from Very High to Medium
- the consequent reduction of the Direct Risk of a LossOfConfidentiality of Customer Data Consequence from Very High to High
Next you will want to repeat this process for the remaining Consequences and Threats that are above what you consider to be a reasonable Direct Risk level. This process should be repeated until all Threats and Consequences are within the acceptable parameters that you have decided upon.
NOTE: You may also need to check the Compliance tab in the Model Summary to identify any non-compliance issues that your system may also face and model the addition of Controls there too
An Alternative Approach
There is another way in which you can apply Controls to your system - by using the Controls tab in the Model Summary panel. In this case, clicking an individual Control will open the Control Explorer panel, where you will find a description of the Control, any Related Controls, and the Assets to which the Control can be applied:
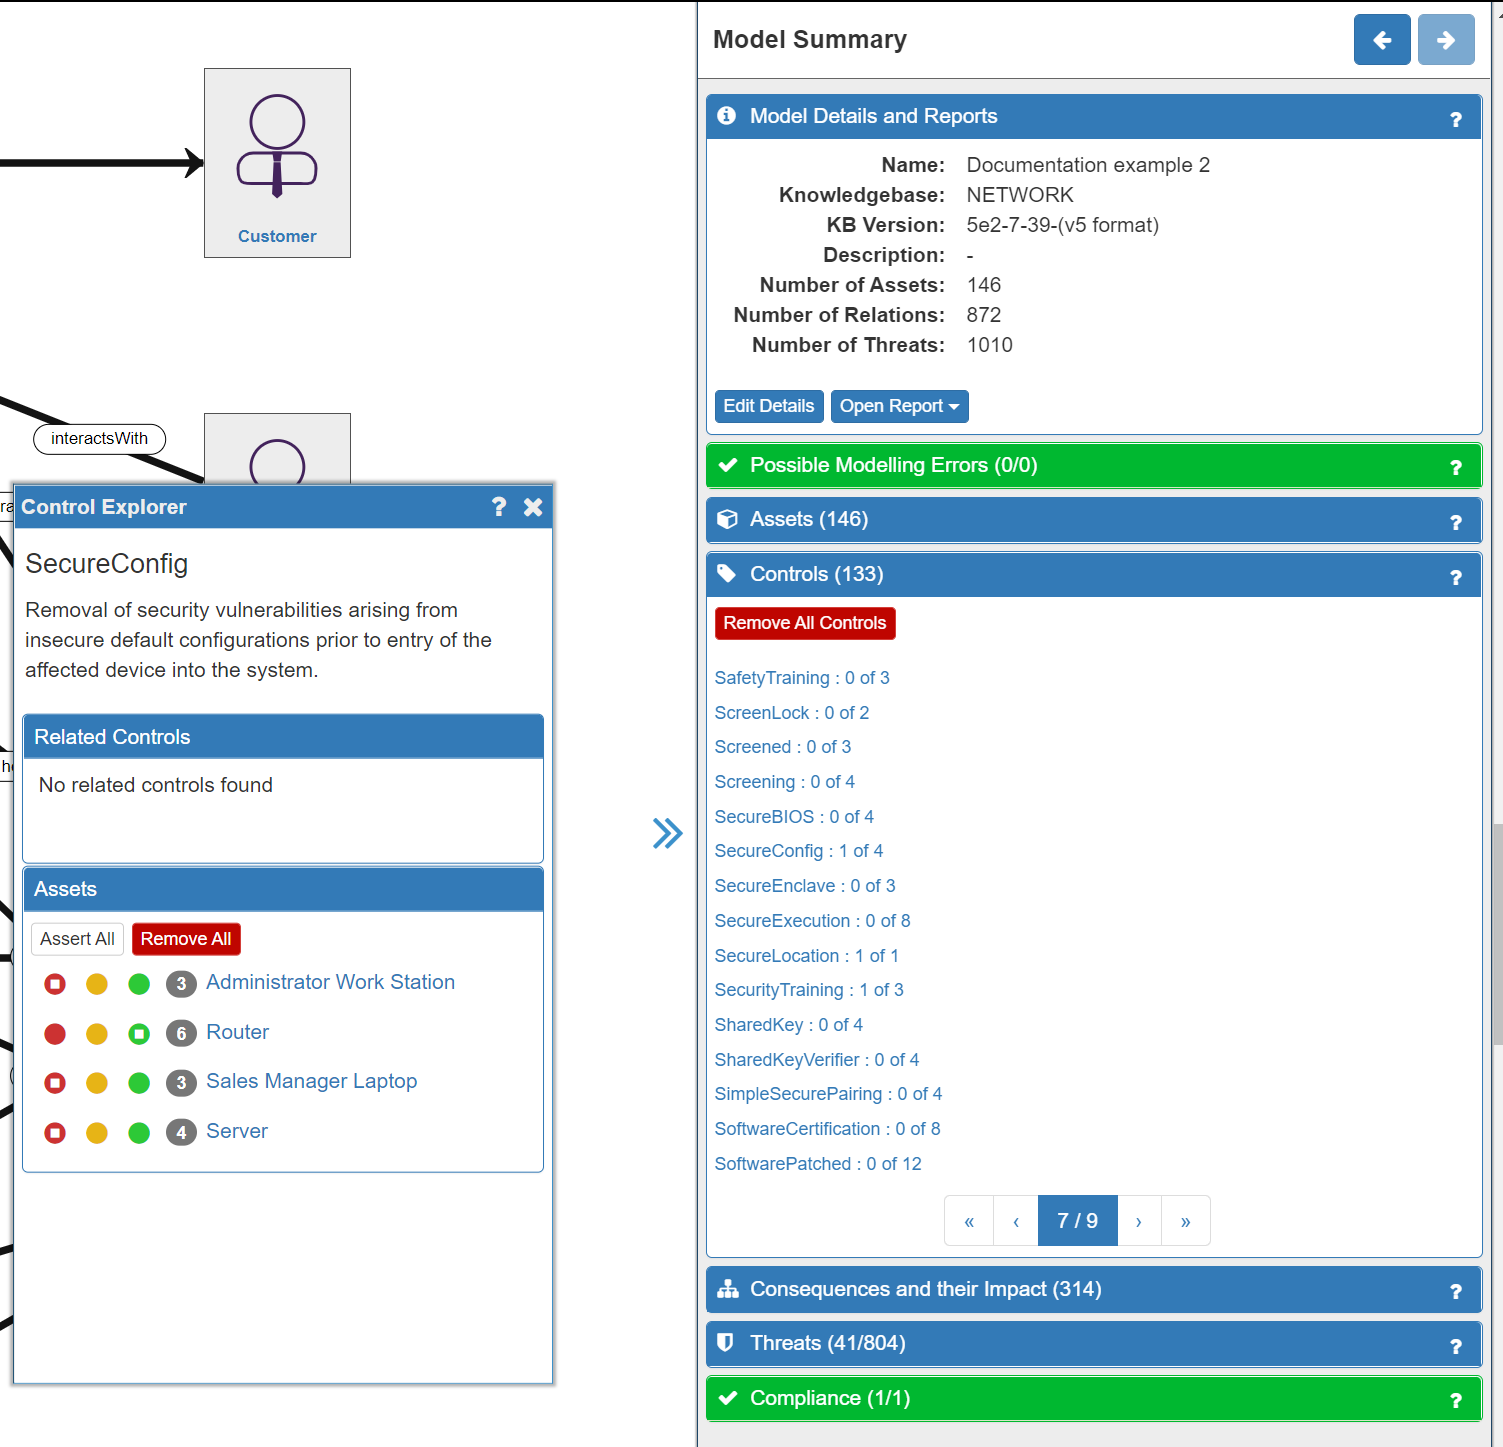
From the Control Explorer you can use the same red-orange-green traffic light system to add the Controls to each applicable asset.
In the image above of our example model, the SecureHostConfig (listed here as SecureConfig) has already been chosen (orange light) as part of the risk treatment for the Primary Threat to the Router Asset. We can now also choose to implement it for the remaining three Assets where it would be beneficial. The numbers in the grey circle indicate the number of Control Strategies that this Control is a part of. You can then repeat this process for each of the Controls listed.
NOTE: it is up to you which approach to risk treatment you prefer
Risk Treatment Plan
Based on the choice of what additional Controls to implement, a Risk Treatment Plan may be created by clicking on the Open Report button in the Model Details and Reports tab in the Model Summary panel and selecting Risk Treatment Plan:
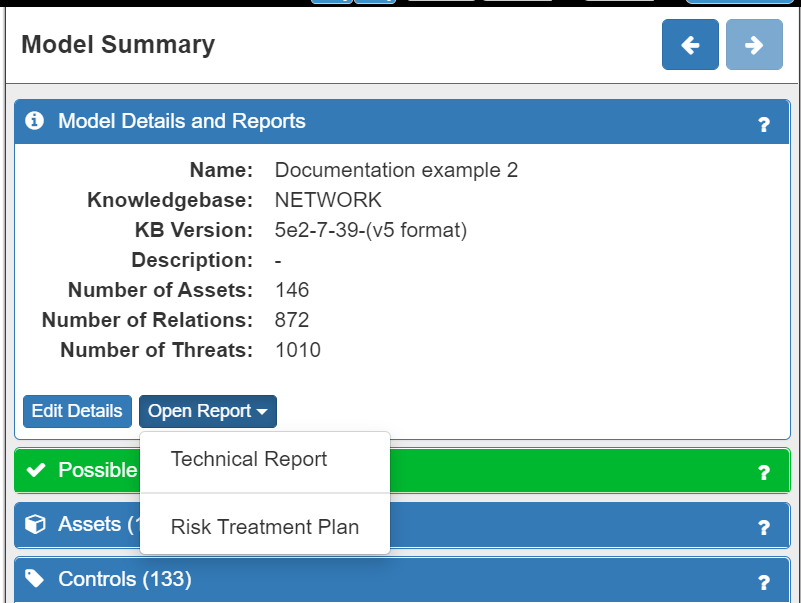
NOTE: You can also download a Technical Report with details of your model from here too
Summary
SSM automatically recommends the Controls / Control Strategies that are most appropriate for treating the security risks that have been identified. It also allows you to model the implementation of those Controls in order to examine the effect they will have on your system risk. It also provides a Risk Treatment Plan for you to download and use.